

Welcome to the fourth post in this blog series. Much like the opening's for the previous posts, I'd suggest you read the others first if you haven't already, as we're building towards something. You can read them here:

For this post, we're going to finish building out the rest of the application policies we need for deployment. Then, create some more smart groups, and make use of a feature in Jamf Pro that very rarely gets mentioned, but quite possibly one of my favourite. Let's start with that!
Inventory Preload
This is a feature of Jamf Pro that I very rarely see get a mention, possibly because it's just not that fun. But, used right, in combination with Smart Groups and Extension Attributes, you can really cut down on your work here.
You can read more about it here:

But, quite simply, it allows us to pre-populate Jamf with information about a device before it's enrolled (and after, too!).
When deploying lab style environments, you're very likely deploying to different rooms, buildings, or clusters that require different things. Building up different onboarding workflows for all of these would be a nightmare. We want to automate things as much as possible! So, that's what we're going to do. For my environment, I make heavy usage of the Room, and custom Usage Type attributes.
If we had a new order of 100 devices coming in, destined for 3 different rooms, would you want to manually assign that room information AFTER enrolment along with the usage type? Of course not. That would also completely break our fully automated workflow!
Instead, we'll make use of Inventory Preload by creating a CSV file with the following information:
| Serial Number | Device Type | Asset Tag | Room | EA Usage Type |
|---|---|---|---|---|
| 12345678 | Computer | BLOG01 | Room 01 | Lab |
| 12345687 | Computer | BLOG02 | Room 02 | Lab |
| 12345876 | Computer | BLOG03 | Room 03 | Lab |
We're now telling Jamf, as soon as you see that serial number, I want you to assign the Asset Tag, Room, and (Extension Attribute) Usage Type to that device. Once this is assigned, it will also automatically update our Smart Groups.
If you don't use asset tags, you can leave that out, but you can instantly see how powerful this simple tool can be. For a full list of default values, take a look at the documentation, but extension attributes are fully useable by prefixing the column with EA and then the name.
With this data available, we can now make use of some Smart Groups that are based on Rooms to deploy different applications, printers, or other settings as part of the whole onboarding process.
As I said, it's not very fun, but I love it. Especially as it gives us the ability to make bulk changes to existing devices, too. Want to move a batch of devices to another room? Easy, just create a CSV with their serial number and add the information you want to change. They'll see these changes on their next check-in.
Smart Groups
Let's build out some more Smart Groups based on the information provided in our Inventory Preload.
In our preload example, we told Jamf we're adding devices to Room 01 - 03. Let's create Smart Groups with the correct criteria.
- Display Name: Blog - Room 01
- Criteria: Room / Operator: is / Value: Room 01
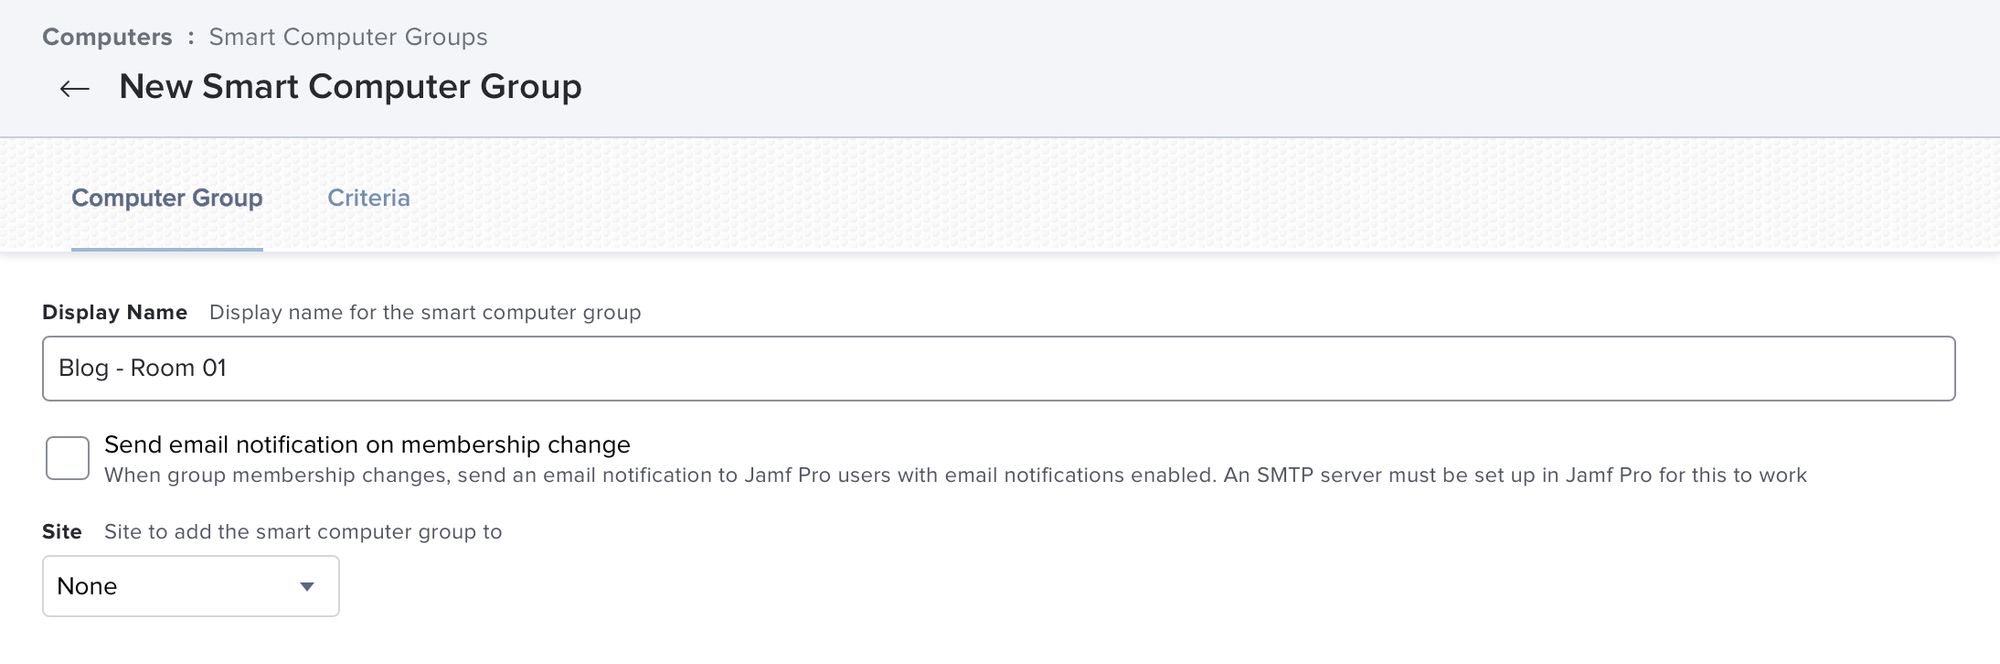
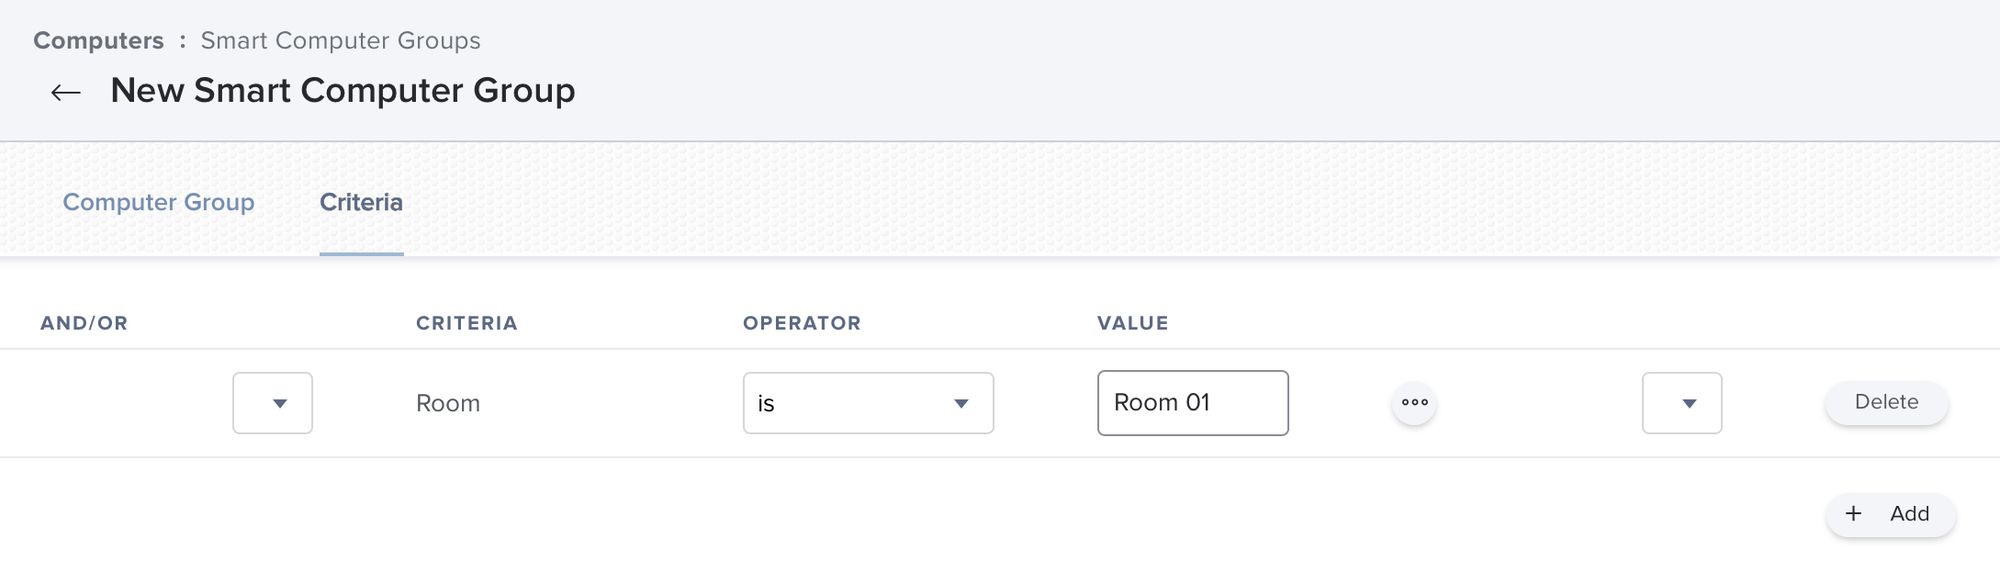
We'd repeat that for the other rooms. Now, as soon as our first device completes enrolment, Jamf will update the computer record with "Room 01", and it will be added to our smart group, and so on.
When it comes to Extension Attributes and Smart Groups, let your imagination run wild! But don't go too crazy, otherwise you could end up with policy scope spaghetti.
Application Policies
Jamf is preloaded with our data, we've got Smart Groups for our rooms. All we need to do now is finish building out our policies for the applications / settings required for each of these locations and scope them to the relevant smart groups.
General Deployment
Our General Deployment will cover the basics that all our Lab machines are going to need. We'll scope these policies to Lab - Auto Advance. Scoping them this way ensures that any device coming through this PreStage will be eligible for them. I feel that this is safe to do, as they're all configured to run using a custom trigger. The only time they're going to run is if we tell them to.
System
- Install Rosetta 2 (Scoped to Smart Group if device has Apple Silicon)
- Set Device Time Zone and NTP Servers
- Set Device Name (BLOG-%SERIALNUMBER%)
Browsers
- Microsoft Edge
- Mozilla Firefox
- Google Chrome
Office Applications
- Microsoft Office 365 (Inc. Teams)
- Remove Outlook for Lab Machines
- Keka
Media Applications
- VLC
- Audacity
- Handbrake
Adobe
- Cache the installer for Adobe Creative Cloud 2022
- Install Adobe Creative Cloud 2022
There's a reason for the caching. I've found that if you cache the installation files, you get far fewer failures than you would if you leave it to it. It can also cut hours off the installation time.
Specific Room Requirements
With all the general requirements have met. You can start looking at any individual room needs. Ensuring that anything here is scoped to the relevant Room 0x Smart Group.
Room 01
- Room 01 Printer
- Scanner Drivers
- Extra Specialist Software
Room 02
- Room 02 Printer
- Extra Specialist Software
And so on. As the device moves through the script, it will query Jamf to ask if there's any other relevant policies that are outstanding. So these will need to be configured to run on recurring check-in. Just make sure you're only running them once per computer (or whatever that policy requires).
Combining with Previous Stages
We've built up quite a number of moving parts if you look back through the posts, and it's easy to get lost in this forest. So let's take a step back and look at this in order.
- Ordered devices, which are automatically added to Apple School Manager by supplier
- Assigned the devices to our MDM "server" of Lab-DEP
- ASM syncs with Jamf and assigns them to the matching Lab - DEP setting under Automated Device Enrolment
- The Lab - Auto Advance PreStage automatically scopes and assigns them to itself based on the settings we configured

- We preload Jamf with Inventory Preload to give it more information on each of the devices
- Smart Groups are in place to automatically update based on the device information provided in the preload
- There are policies scoped to a Smart Group based on the PreStage that will tell the device to automatically log in with our local admin account created during PreStage
- We then scope further policies to another Smart Group based on whether a device has automatic login enabled
- Power on the device, and it makes its way through setup using Auto Advance
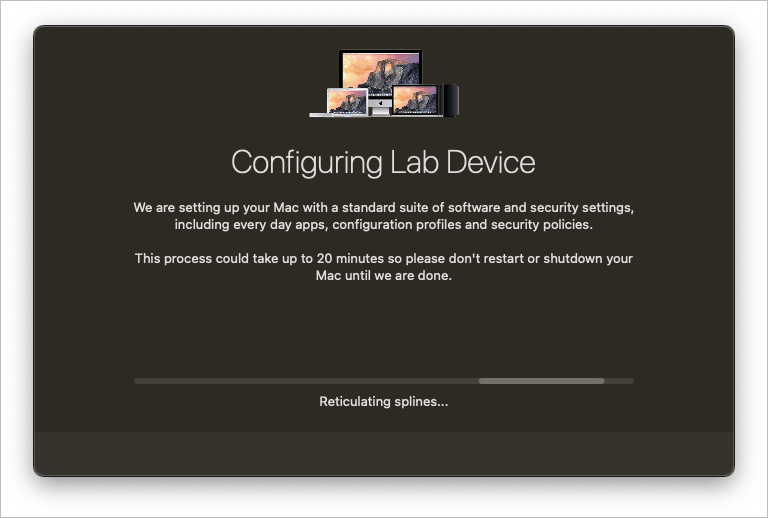
- Once one of these devices logs in, the policy will trigger and install DEPNotify, and then kick off the script we configured to install our policies using a full screen style feedback
- By adding some Jamf Recon calls within this script at certain points, we ensure that devices are keeping Jamf up to date with information as it goes
- Once the general policies complete, we have further policies scoped to specific rooms that we can call on towards the end of the script with a Jamf Policy check
Here's a GitHub Gist of what this script could look like following our path and examples:
As you can see, we're working through our application policies, installing all the general software. Once they are done, we make a final recon call back to Jamf to update the inventory, and ensure any smart groups are up-to-date. Once that's done, we run a policy check to see if there are any other policies remaining. In our case, this is where the different room policies would run based on the smart groups. So, any in the "Blog - Room 01" group would run the policies scoped to those, etc.
On line 62, you'll notice that I'm writing out an "onboardingComplete" string to a custom plist file. And then, lines 67 - 70 we install NoMAD and remove the auto login we've configured.
We'll cover these last bits in the next post, where we concentrate on getting the device "User Ready".
Summary
This post covers preloading information in to Jamf, allowing us to sort our machines in rooms, buildings, custom groups, and many other ways.
Creating Smart Groups to make use of this information before Jamf even sees the device.
Categorising our application policies, and adding them to the script.
And finally, putting all those steps together makes you realise how much work goes in to something like this.

From an external appearance, it seems as though things are swimming along easily. Underneath, there are things swishing left, right, up, down, and possibly in some directions that may not even be considered directions. But, that's why we have jobs. Make the seemingly impossible requests look easy.
We're almost done with this series of posts, and I hope you've enjoyed them and that they've been useful. The next post will cover the last few pieces of the puzzle in getting the device in to a true user ready state.
And then, the finale. The summary post, where we'll step back and marvel at the monstrosity that has been born. I'll also be creating a high-level flow chart style overview on how this whole thing fits together.
The post Photo for this post series was by Quaritsch Photography on Unsplash