Fully Automated Lab iMac Deployment with Jamf Pro & ADE: Part 5 - User Ready
Intro
Wow, I can't believe we're here. The final stage of this workflow. All that's left to do is make the device ready for the user. What a journey! If you've made it this far, congratulations. Reading my waffle is not easy. However, if you're just jumping in, you may want to go back and read the other posts in the series - especially the first. There are some prerequisites that you really shouldn't skip. Alternatively, you could wait until Thursday, when a full summary post goes up.

Let's get on with the show.
Previously
In part 4, we covered creating some more Smart Groups, filling out our DEPN script with the rest of the application policies we wanted to deploy, and making use of the Inventory Preload feature.
In this post, we're going to go over the last few lines of our DEPN script to get them into a user ready state.
# ## Send updated inventory for Smart Groups and check for any remaining scoped policies
DEPNotify "Command: MainText: Installing Room Specific Requirements"
DEPNotify "Status: Update inventory record."
jamfCommand recon
sleep 3
jamfCommand policy
sleep 3
/usr/bin/defaults write /Library/Preferences/co.uk.grayw.blog onboardingComplete -string "Complete"
#
## Prepare for Final Usage
DEPNotify "Status: Install NoMAD & NoMAD Login"
jamfCommand labzt-nomad
DEPNotify "Status: Removing Auto Logon"
jamfCommand labzt-remove-autologon
Let's work from top to bottom.
Onboarding Complete
There are certainly improvements we could throw in here, and perhaps this isn't the perfect method, but I want to know when a device has reached the end of this process. To do that, I'm going to write out to a plist file.
/usr/bin/defaults write /Library/Preferences/co.uk.grayw.blog onboardingComplete -string "Complete"There's a reason I'm not doing this before the recon command. We don't want other policies running during that jamfCommand policy line, and interfering with our onboarding process. We'll let it get those on the next check in once we're done.
To make scoping of generic policies easier, we're going to make use of this by creating another Extension Attribute.
Extension Attribute
We'll create the Extension Attribute as a script that looks like this.
#!/bin/bash

status=`defaults read /Library/Preferences//Library/Preferences/ac.uk.grayw.blog onboardingComplete`
if [ "$status" == "Complete" ]; then
    echo "<result>Onboarding Complete</result>"
elif [ "$status" != "Complete" ]; then
    echo "<result>Onboarding Not Complete</result>"
fi
In Jamf, that will look like this:
Display Name: Onboarding Status
Description: Checks to see if the onboarding defaults string is set to complete
Data Type: String
Inventory Display: Extension Attributes
Input Type: Script
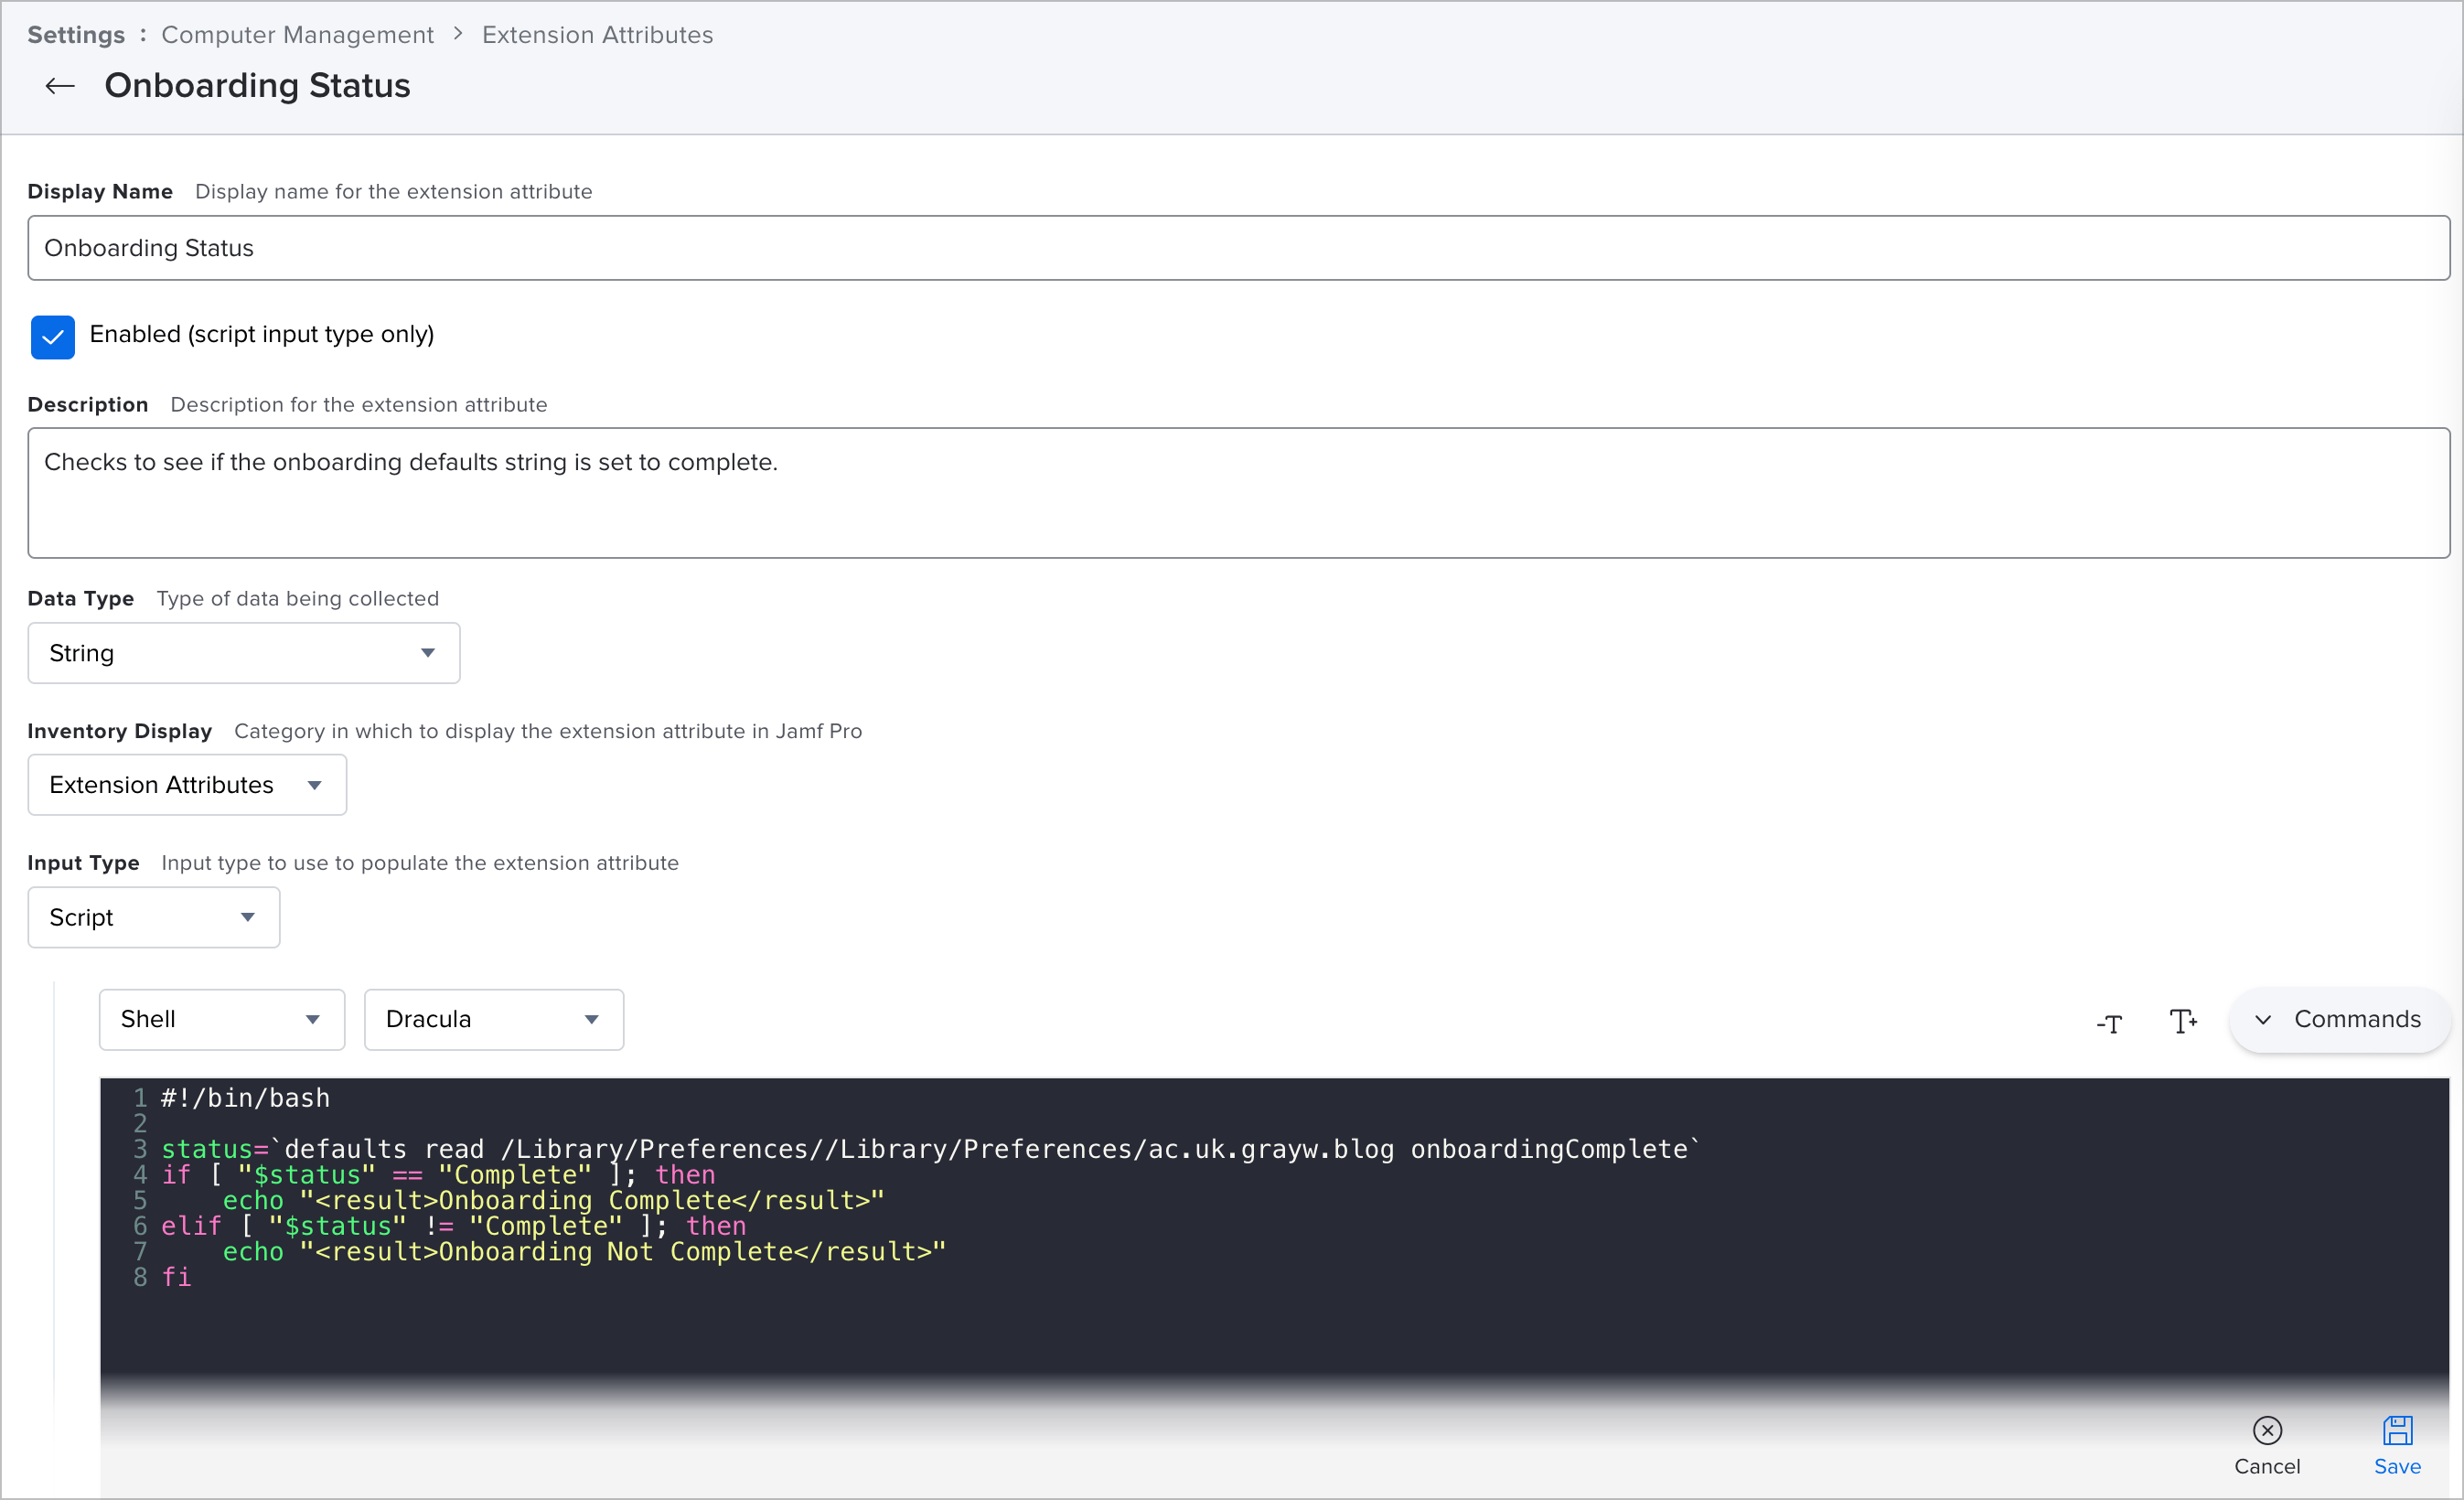
Jamf Pro - Extension Attribute Screen
Great, now we have another attribute to work with, we need to actually do something with it.
Smart Group
Let's create another Smart Group based on this new attribute.
Display Name: Devices - Lab - Onboarding Complete
Criteria: Onboarding Status IS Onboarding Complete
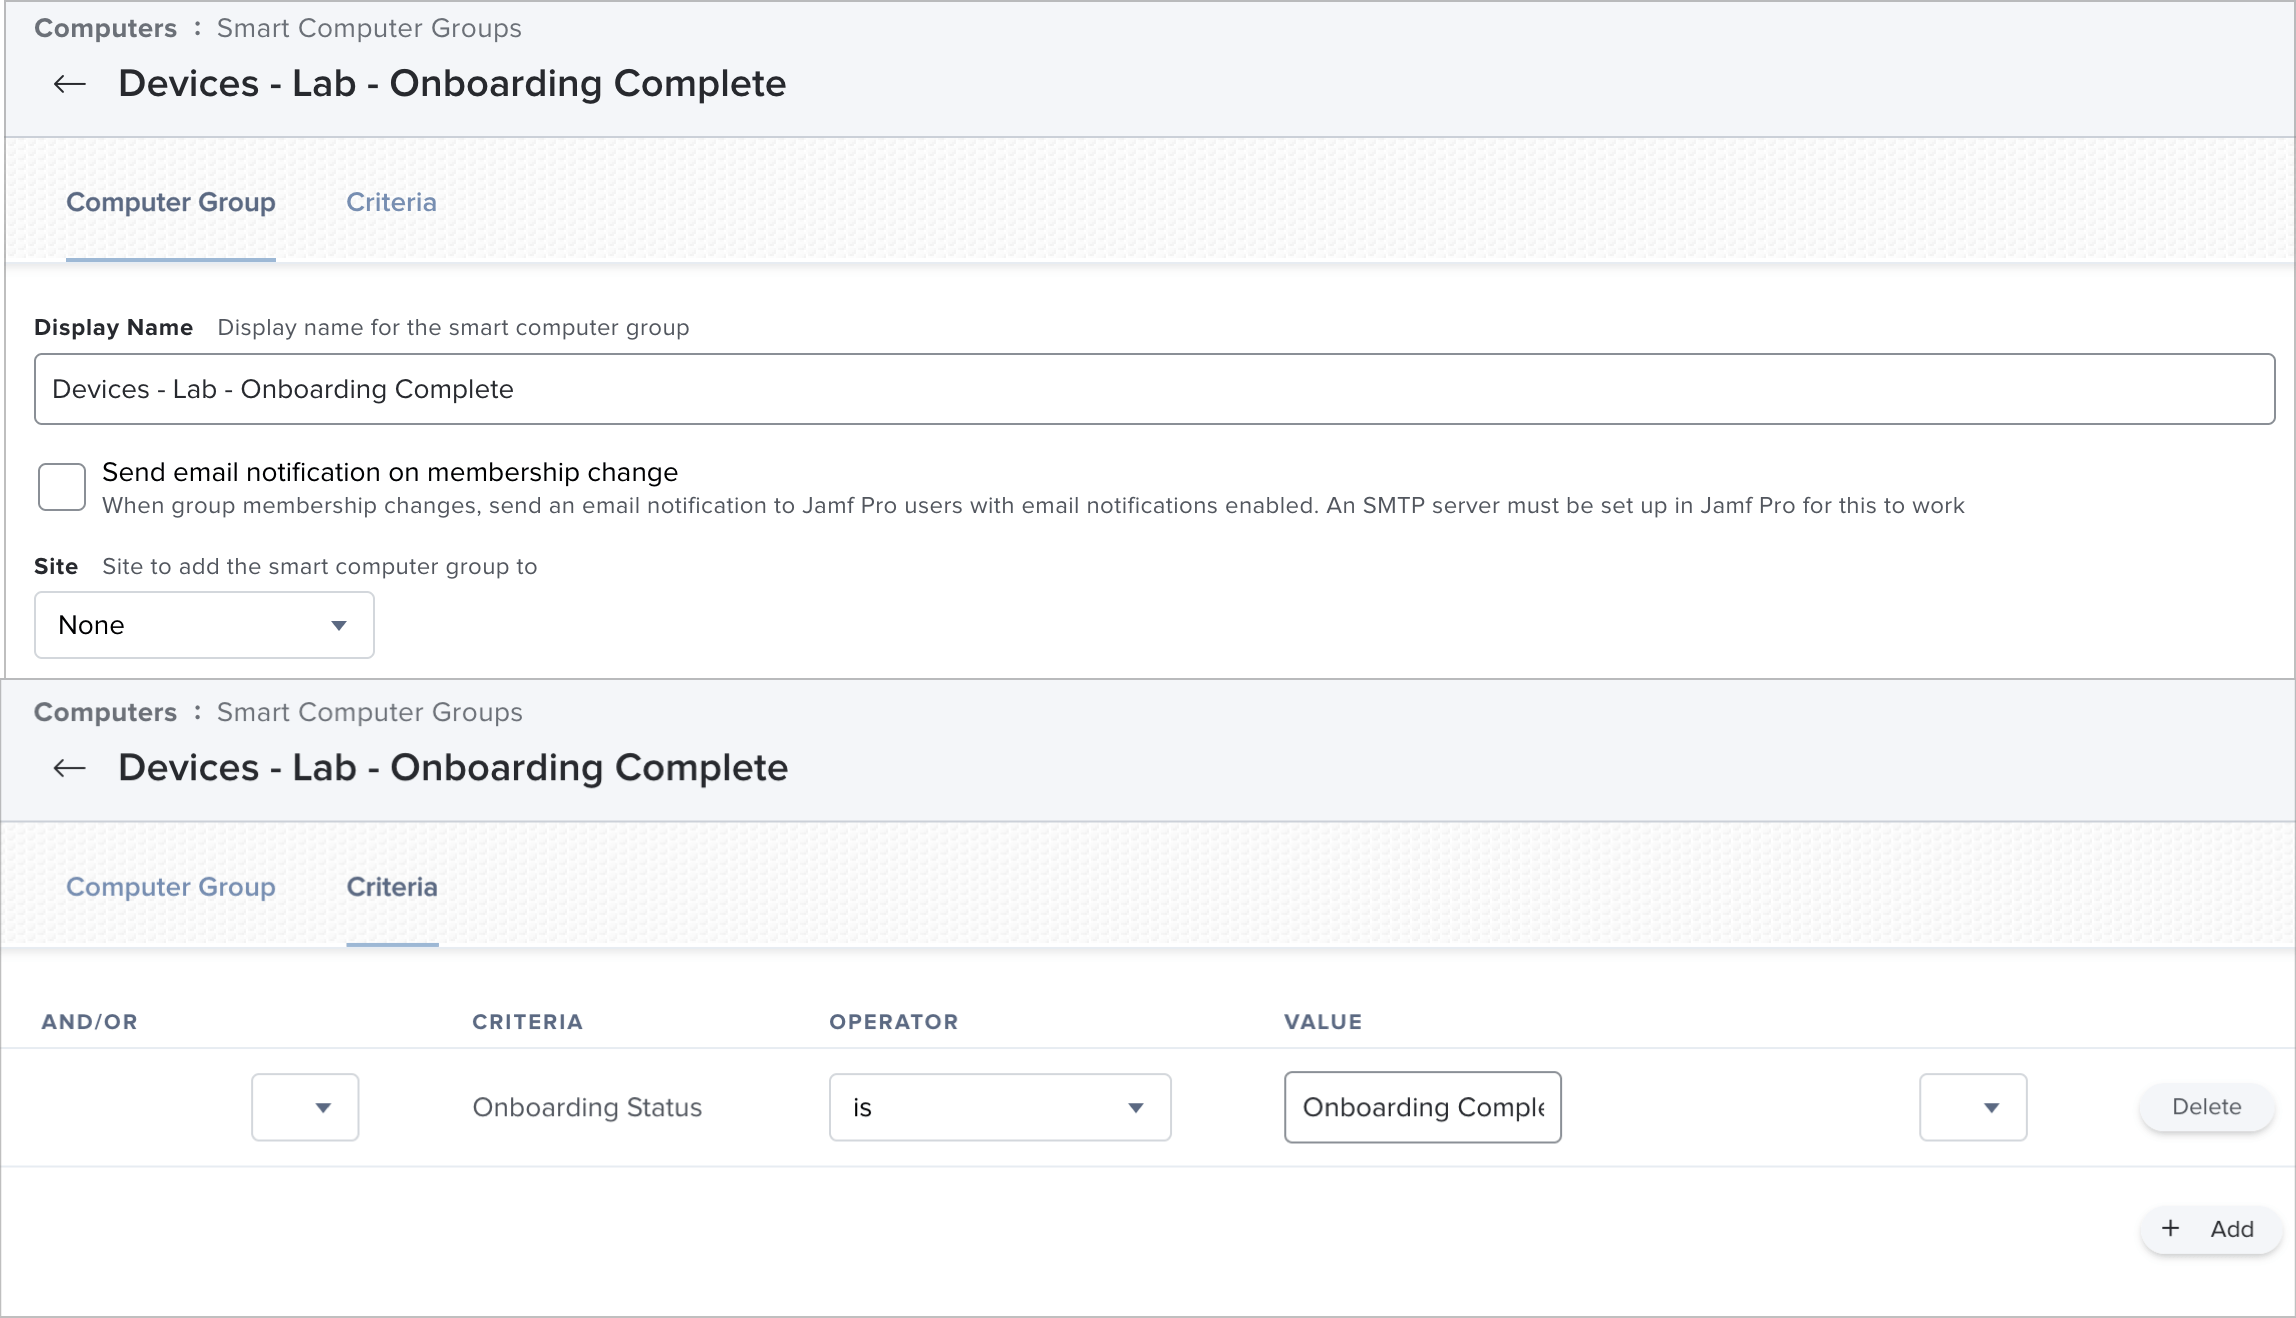
Jamf Pro - Smart Group Screen
Done. Now we can scope any future policies to this group knowing that they have very likely finished doing what we need them to do first, and that they are in a certain state. You could also base other Smart Groups off of this, too. Perhaps you only want room specific software to install after this whole process is complete so that the users can just get on with the basics? Clone this, and add an AND clause with the room information. You then have a group based on the room AND that they need to have completed the onboarding.
Right, let's tackle the final two policies.
Installing NoMAD & NoMAD Login
Our lab machines are authenticating against Active Directory. They are not bound, and haven't been for some time. Quite frankly, it's a nightmare. To get around that issue, I make use of NoMAD and NoMAD Login.
If you haven't heard of these, it's worth taking a look. However, keep in mind that Jamf acquired them back in 2018: https://www.jamf.com/resources/press-releases/jamf-acquires-nomad-the-leading-solution-for-streamlining-mac-authentication-and-account-management/ - Since then, nothing much has really happened development-wise, as they're pushing the Jamf Connect (paid licence) angle.
Not all hope is lost yet. Work is underway with NoMAD 2 with all sorts of quality of life improvements, and feature updates. It is not production ready.
Joel Rennich / nomad2
\
NoMAD the second major version.
\
![]() GitLab
\
GitLab
\
![]()
For now, we'll continue to use the versions available from nomad.menu.
The first thing we'll need to do is download and get the PKGs on to your distribution point(s). I'll leave that part up to you. But, if you want to know how I'm syncing HTTPS DP's, let me know. I'll write something up.
My only suggestion is to number these packages. You want to install them in a specific order.
- 1.NoMAD.pkg
- 2.NoMAD-LaunchAgent.pkg
- 3.NoMADLoginAD{version}.pkg
I have found that not installing in this order can lead to unexpected behaviour.
Policy
With the files in place, we now need to create the policy. The settings for mine are as follows:
Display Name: Lab - Zero Touch - Install - NoMAD
Category: Lab - Onboarding - General
Trigger: Custom: labzt-nomad
Execution Frequency: Once Per Computer
When you add the packages to the policy, they should install in order, like this:
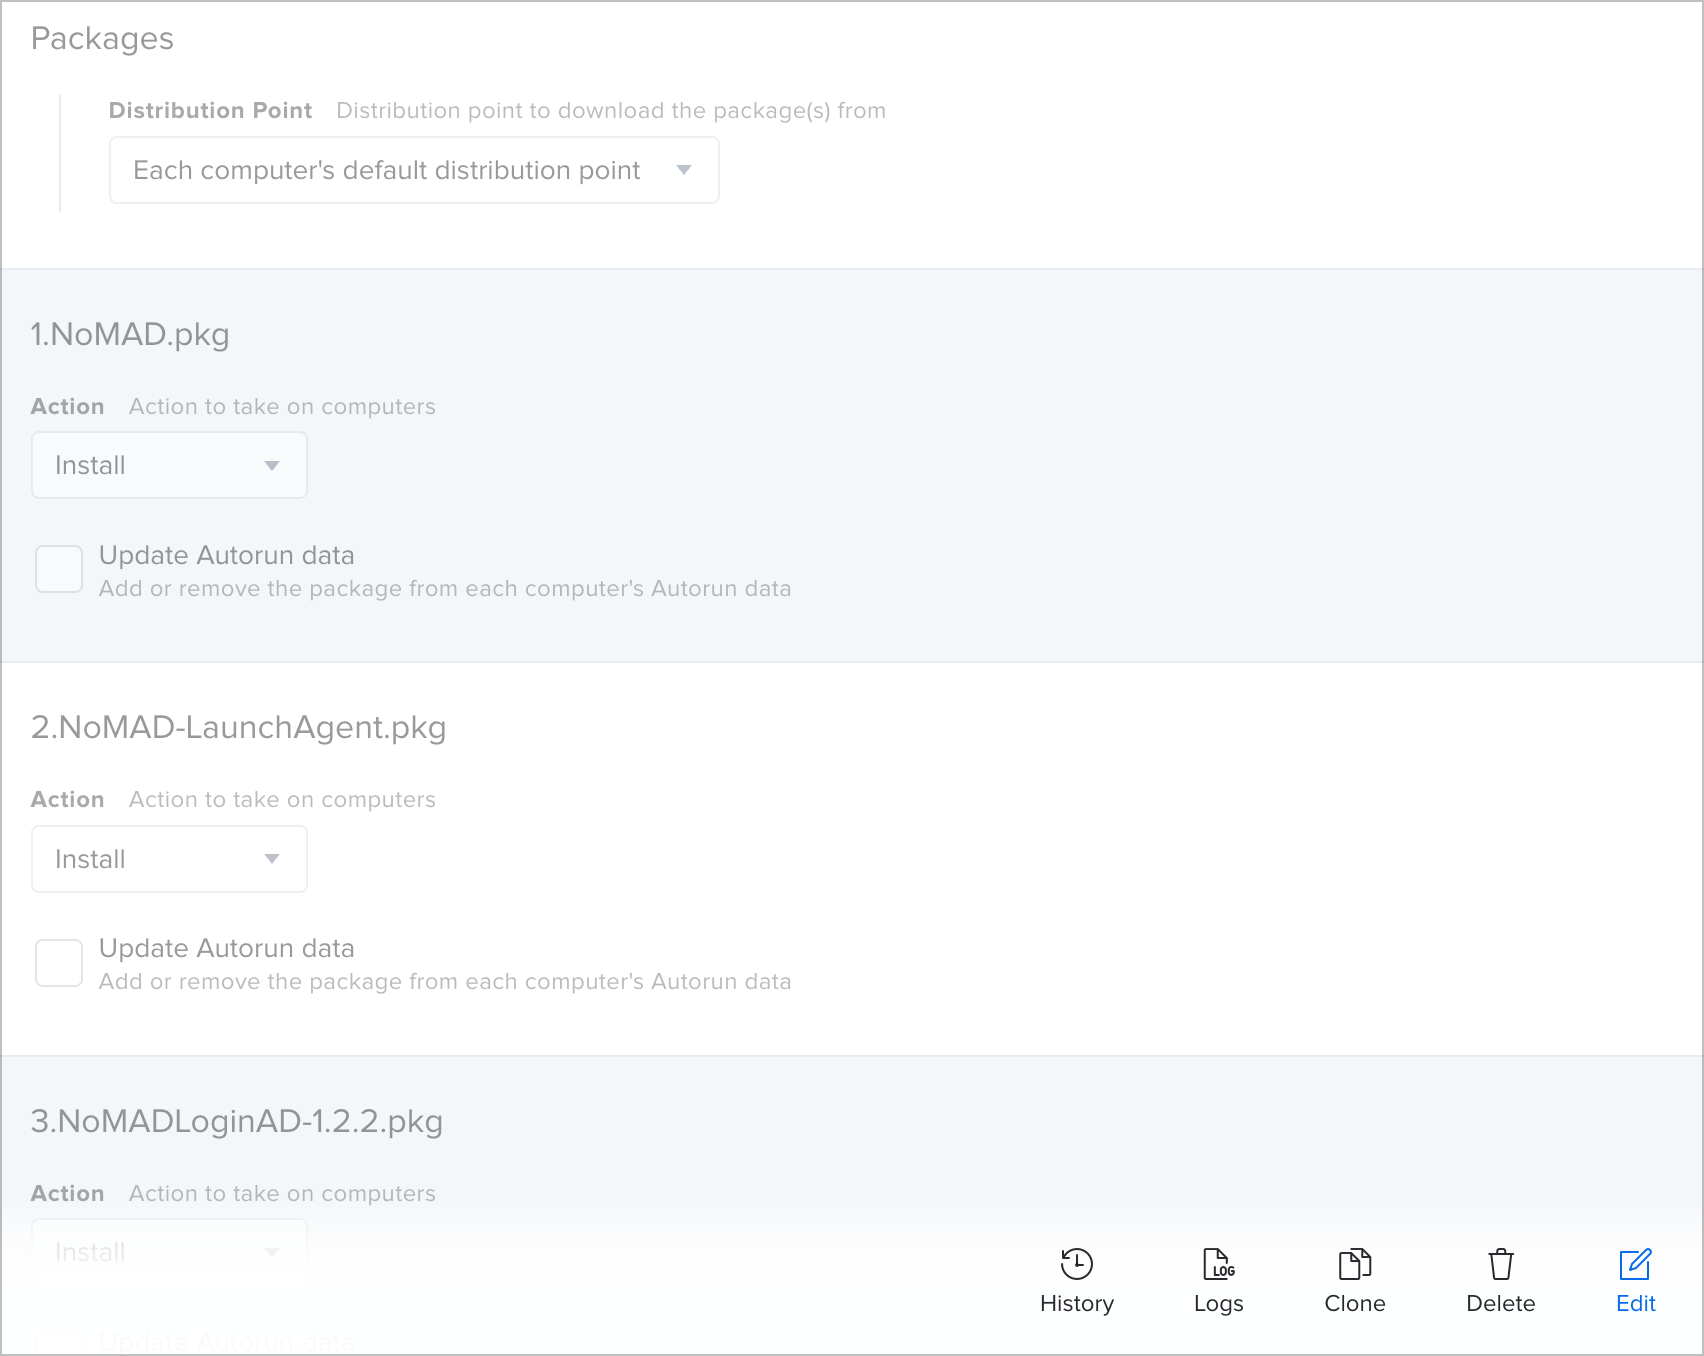
Jamf Pro - Policy Packages Screen
We'll scope this to our Devices - Lab Auto Advance - Zero Touch Smart Group to ensure that it runs when called from the DEPN script.
Configuration Profile
The other really important part you're going to need to create for NoMAD is a Configuration Profile, and ensure that it is scoped to these devices. Again, the best option here is to our Devices - Lab Auto Advance - Zero Touch Smart Group.
Due to the obscene number of settings, and environment variations, I can't even begin to tell you what you should have set in here. What I would suggest is to make use of the Profile Creator tool.
 GitHubProfileCreator
\
GitHubProfileCreator
\
Use this to create a payload for both NoMAD and NoMAD Login. This has been working for me in this way for 5 or so years, back when these devices were running through Open Directory. Way before our Jamf times, and before I was part of this team, but somehow still had some say in how the Mac's behaved … (I'm beginning to feel like I've been set up).
However, there is an alternative. I have not tested this method yet.
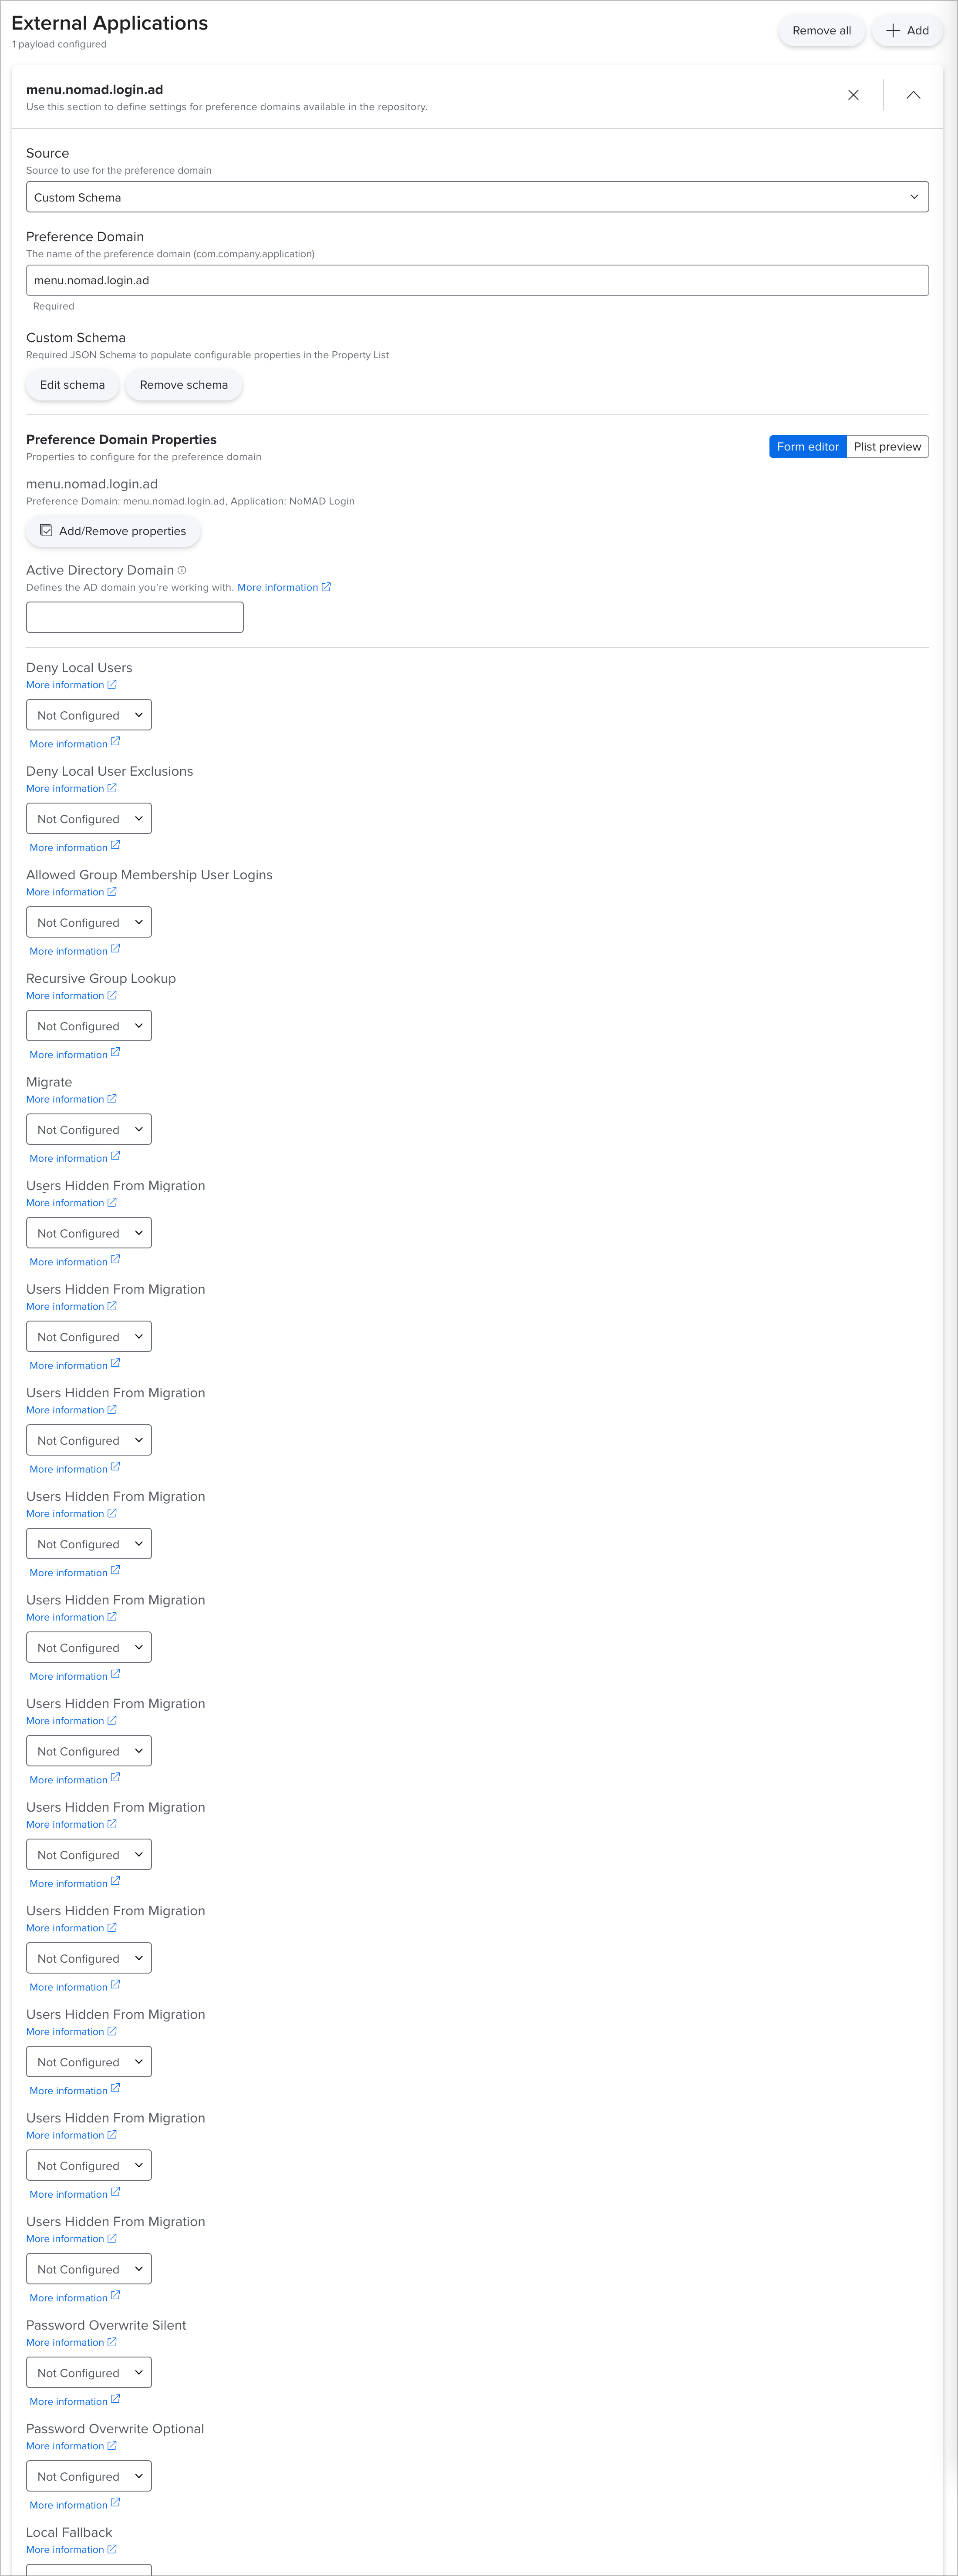
Jamf has greatly improved the ability to import custom schemas for external applications within their configuration profile creation tool. And there are schemas out there for both of these applications.
I plan on migrating to this method, as it will make it far easier to update/change settings in the profile on the fly. Currently, it's stuck as a single uploaded .mobileconfig that I created years ago. If you'd like to see a post on this testing, let me know. But for now, here's a quick screenshot of not even a quarter of the settings made available through the custom schema.
OK, that's NoMAD dealt with. On to the final part of the puzzle.
Remove Auto Logon
With all our applications installed, all we have left to do is tell the device to remove the auto logon entry. Otherwise, it's just going to keep signing in as our default user. This may actually be useful to you, but not for me, and not what we're trying to achieve here.
As you can see from the DEPN script segment at the start of this post, we're calling the "labzt-remove-autologon" policy trigger. So yes, we're creating another policy!
Policy
Cast your mind back to part two of the series.

We made use of the AutoLogin script from brunerd.
If we take a look at lines 15-17 of that script, we can see that by passing a blank value, it will disable auto login for us.
#JAMF script parameters are shifted +3
#provide a username, if blank will disable autologin
USERNAME="${4}"
We've already got the script in place with the parameter options. This makes our policy pretty simple.
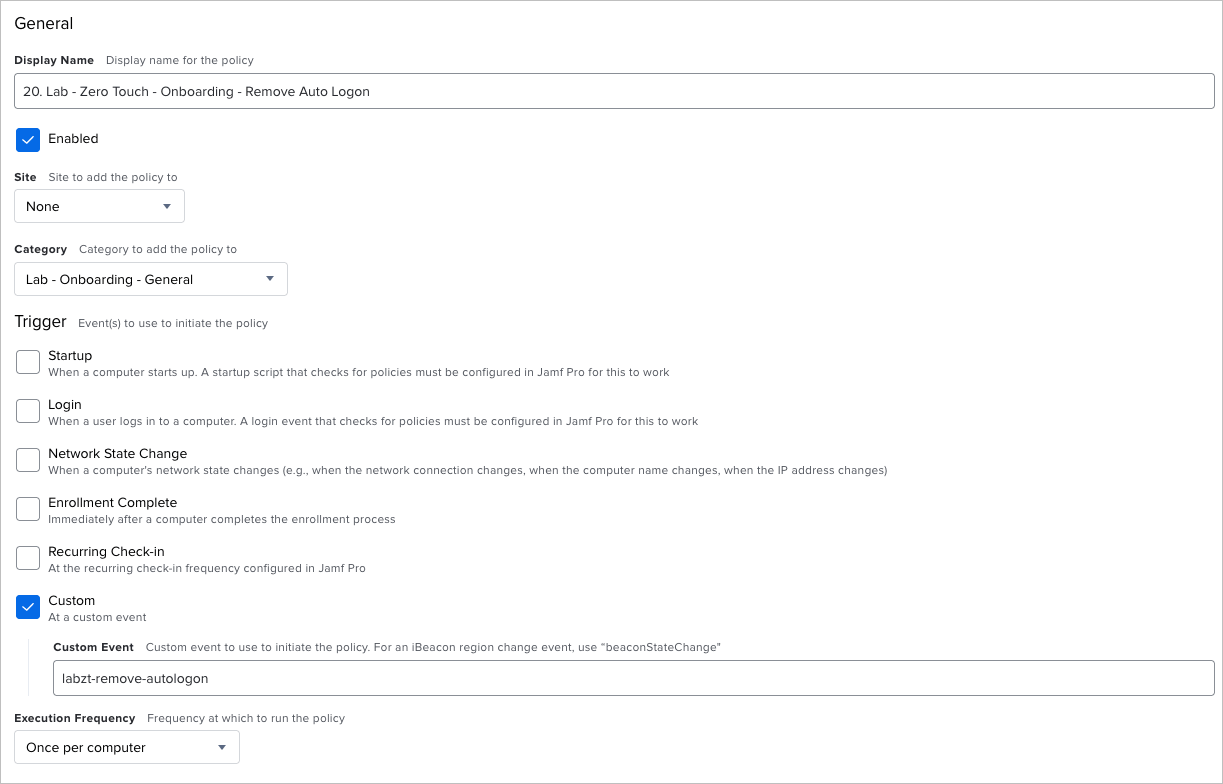
Display Name: 20. Lab - Zero Touch - Onboarding - Remote Auto Logon
Category: Lab - Onboarding - General
Trigger: Custom: labzt-remove-autologon
Execution Frequency: Once per Computer
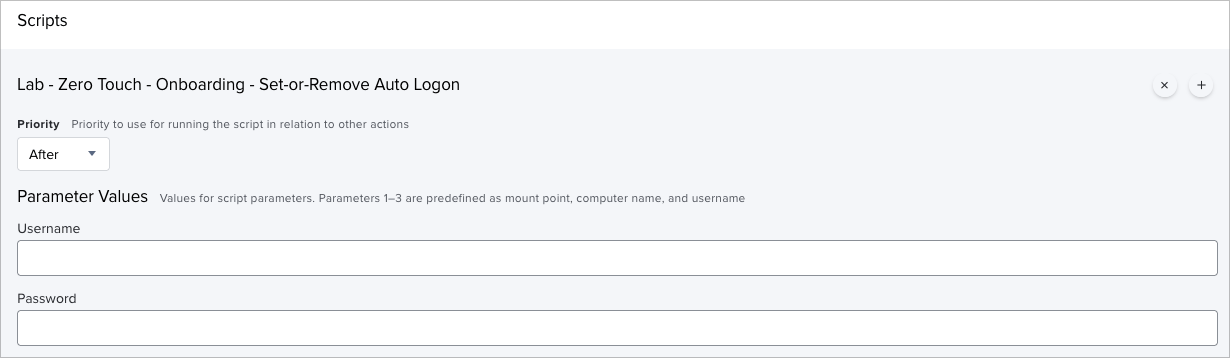
Next, we'll configure the Scripts option to run our Lab - Zero Touch - Onboarding - Set-or-Remove Auto Logon with blank values for Username and Password.
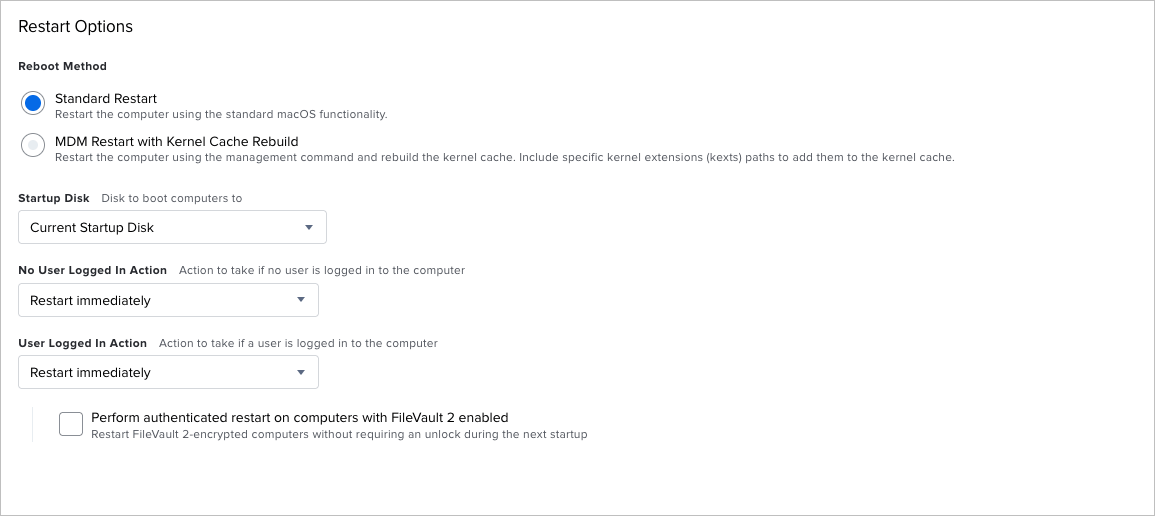
And finally, we'll configure the Restart Options to Restart Immediately.
As for scoping, we'll scope this to Devices - Auto Logon Enabled Smart Group. This will ensure that it can only run on devices that have fallen in to this Smart Group.
And that's it, we're done.
Summary
Not much was really done in this post, but it was an important final step in getting the device in to a user ready state. With all of these steps together, we can now assign a device to our Lab - DEP MDM server in Apple School Manager, have it automatically assigned to the PreStage in Jamf. If we include some Inventory Preload information, we can tell it about asset tags, rooms, and all sorts (optional but heavily recommended).
Turn the device on, and watch it go!
We can now take a device from this:

Apple iMac - Brand New in Box
Through this:
Where all the person on the other end sees is this:

Shameless steal from https://github.com/jamf/DEPNotify-Starter/blob/master/example-img/fullscreen\_setup.png because I forgot to take a screenshot while it was running.
Which, after an automatic restart, leads us to:

A fully automated Zero Touch Lab iMac Deployment with Apple School Manager and Jamf (and a boat load of policies, scripts, packages, and if you're in to it, prayer).
We are successfully deploying machines like this, across multiple sites. In a live environment, not just test.
Closing
I truly hope that you have found this series useful, and that it has given you some ideas for your own environment. I'd really love to hear from you about what you're doing, or how I can improve my process, too.
You can find me in a few places online.
- Mastodon
- MacAdmins Slack (#uk / #lab-environments / and more …)
- Matrix @grayw:opensuse.org
Yep, I think that will do it.
And again, thank you so much for following along and reading. Don't forget to check back on Thursday (or use RSS ;)) for the full summary post.
The post Photo for this post series was by Quaritsch Photography on Unsplash