

Welcome to part one of my blog post series about deploying lab (multi-user) iMac’s in a fully automated way, from box to … bench? I’m not sure how many posts this is going to be split down to yet.
I can’t guarantee that this is the perfect way of doing it, but it’s what I’m doing right now. Not only that, but I’d love to hear your feedback in areas where this could be improved. There are a lot of moving parts, so if you’re following along, I’d advise you wait for all parts to be published, go through it, and plan it out for your environment rather than just blindly following.
In this first post, I’m going to detail some prerequisites and the setup required to make any of this possible.
I’m mostly writing this for myself, because, if I ever have to try to put any of this back together again, I’m going to need notes. This has been the culmination of a lot of learning, and many, many mistakes over the past few years that I’ve been working in this team.
Pre-Requisites
Apple
The very first thing you’re going to need in place is either Apple Business Manager, or Apple School Manager. This whole process relies upon Automated Device Enrolment (previously known as Device Enrolment Program (DEP)). Without it, this entire automated process falls at the starting gate.
Your devices will need to be running macOS Bug Sur or later.
MDM (Jamf Pro)
The next thing you’re going to need (at least if you’re following along with me), is Jamf Pro. I’ll be working from a self-hosted installation, but I see no reason as to why this wouldn’t work with the Jamf Pro Cloud offering. If I get around to it, I may actually try it from the Beta Cloud service, too.
Within Jamf Pro, you’re going to need to have at least one HTTPS distribution point configured to ensure the machines can download the required packages when prompted.
You can read through the Jamf documentation on setting these up here, so I won't cover these in-depth configs:

Network Infrastructure
And, of course, none of this will work without a properly configured network with DHCP, and a clear shot out to all the required Apple and Jamf endpoints.
Due to the myriad of network equipment and personal configurations out there, I’m not going to cover this section at all within any of these posts.
You can find all the network requirements for Apple services within their documentation here:

And, similarly, you can find all the network requirements for Jamf Pro here:

I appreciate that not all Apple Admins have networking experience, so if this is the case, I suggest you discuss this with your relevant networking team to ensure that this will be possible for you.
Right, that’s it. On with the rest of the show.
Apple Business/School Manager Setup
As I’ve already mentioned, one major part of this will be the configuration of your A(B/S)M account.
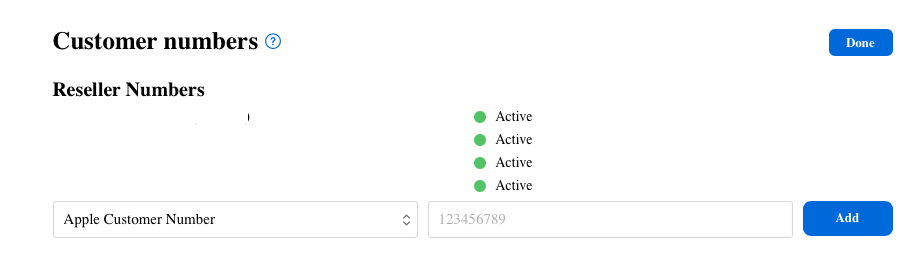
Step 1: Ensure that your suppliers are correctly setup to add devices to your account.
When you order a device from your supplier, you’re going to want to make sure that they add it to your ASM account. I’m going to refer to it as ASM from here, as that’s what I’m using - but I believe they are interchangeable.
To do this, you’re going to need their Apple account details and add them to your approved suppliers.
Once this is done, whenever you order your devices, they will be automatically assigned to your ASM account. Like so:
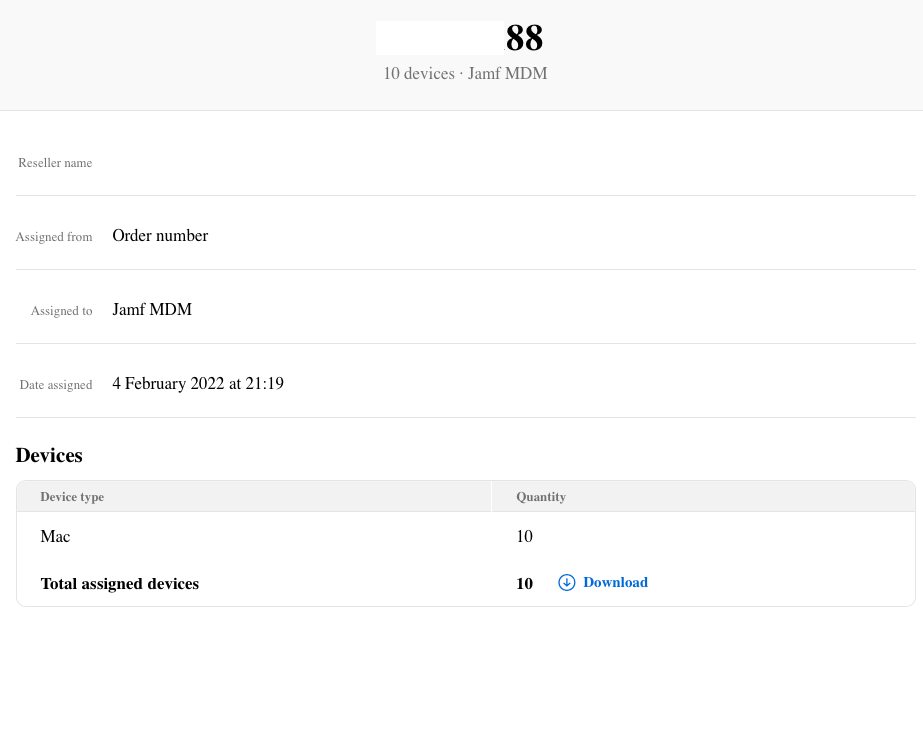
Without this, your devices will not be available for ADE (DEP) style enrolment in to Jamf Pro, which will make it impossible for later steps.
Step 2: Set up your MDM servers
Next, you’re going to want to make sure that add your Jamf Pro service as an MDM server.
During our original setup and mandatory kick-start induction, this was originally set up as just one MDM server, with all devices being automatically assigned to it. It wasn’t until I spotted something in an Apple Event screenshot almost a year and a half later that I even considered this next part to be a thing. Once I tried it, it really opened my eyes and completely changed the way I was doing things within Jamf.
Despite it being one single Jamf Pro instance, you can see here that I’ve configured multiple MDM servers.
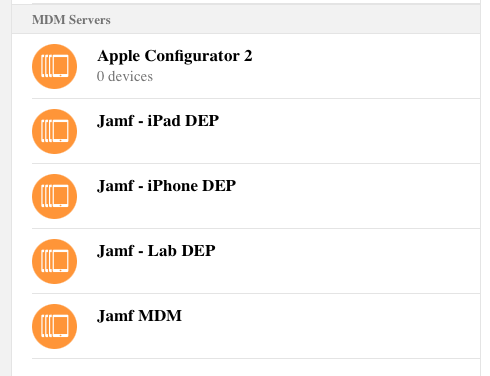
Above, you can also see that I have configured a “Jamf - Lab DEP” server. Again, this is still pointing to the single Jamf Pro instance.
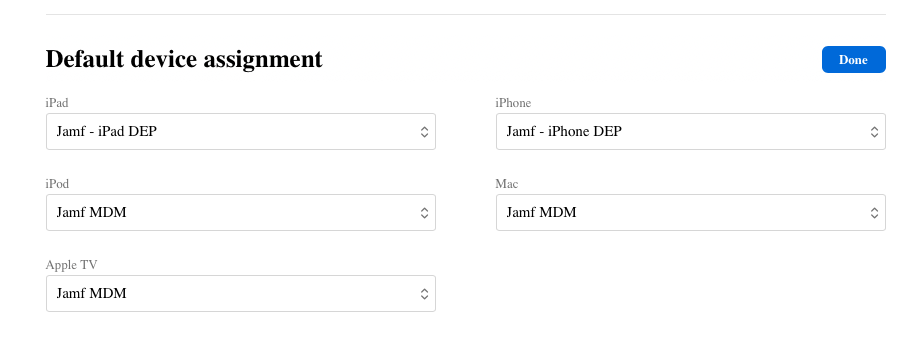
All will become clear when you see the Jamf side of this. But simply, any device that’s an iPad will be automatically assigned to the iPad server, and an iPhone to the iPhone server. Quite self-explanatory.
Jamf Pro Setup
I will not be teaching you how to configure this in this blog post series, as Jamf already has this documented:
I am not taking responsibility for you messing up your server configurations and breaking everything ;).
Anyway, once this is configured, you will have your respective Automated Device Enrolment settings on the Jamf Pro side, too:
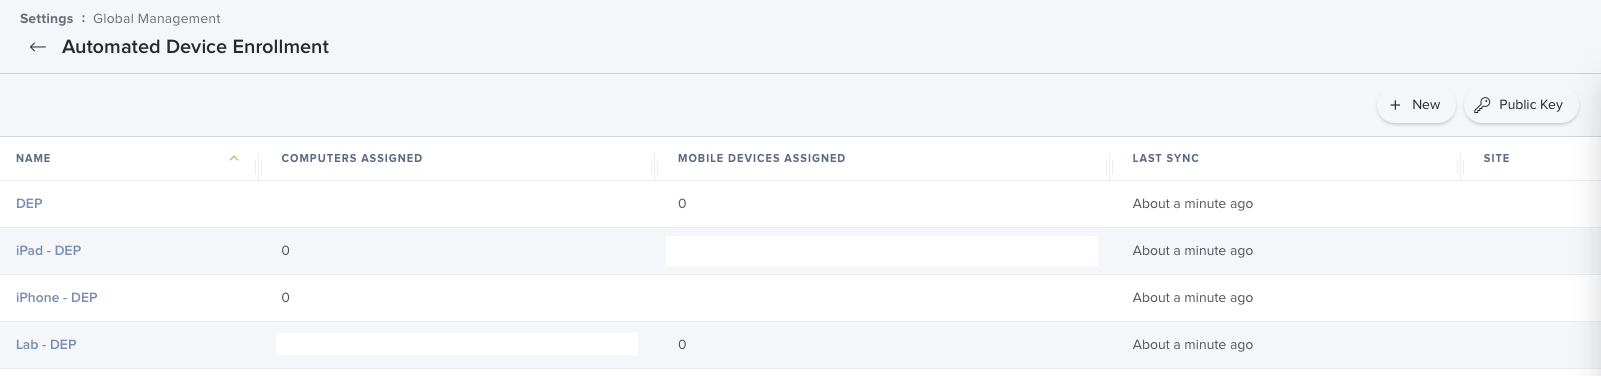
As you can see, mine (almost) mirror that of the ASM side, making it obvious what they’re for. I have no idea of the skill level of the person that may need to manage this after me, so the kindest thing to do is to try to make it obvious what I’m trying to achieve.
Step 3: Set up your PreStage Environment
With the server connections in place between ASM and Jamf, we can now start to configure our PreStage environment for the Lab devices. For a deeper dive on this topic, I’d suggest reading the Jamf documentation.
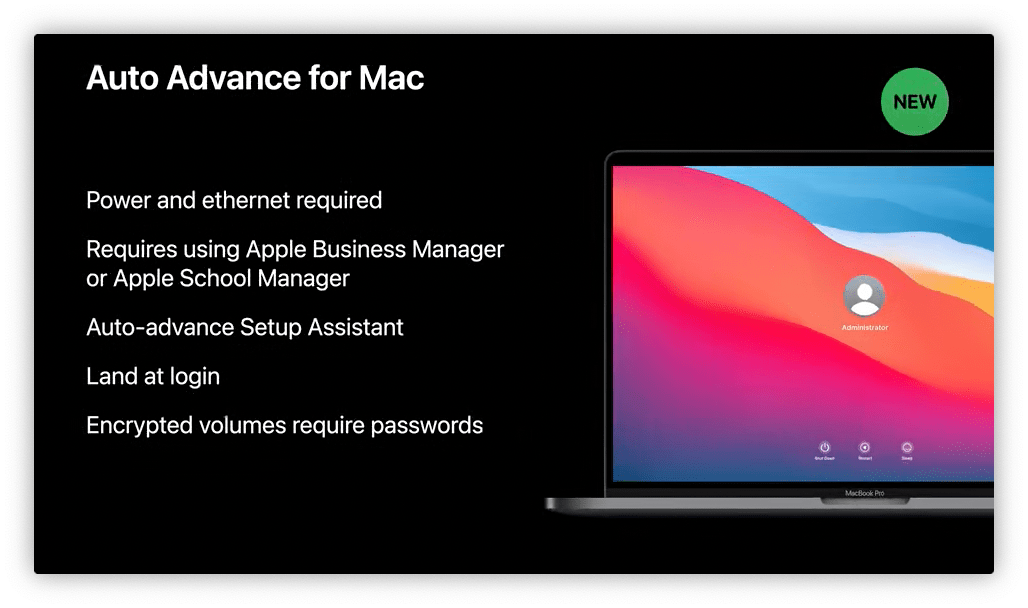
The important part of this feature that we’re going to be making use of, though, is Auto Advance. This is key to the full automation side. It’s also why your devices need to be on Big Sur or later, and you need to have working DHCP.
We’ll now configure our PreStage to do what we need it to do. Another key part here is to ensure that you’re automatically assigning devices from the Lab DEP server to this PreStage.
By doing this, anything that you assign to the Lab DEP server within ASM is going to be automatically synced with Jamf Pro’s Automated Device Enrolment configuration. In turn, automatically assigned to this PreStage, ensuring that you don’t have to do any manual assignments. Just assign them once at the high level, and you’re done. It’s worth noting here that if you change the assigned MDM server in ASM, that’s going to change in Jamf, too. So, if your device is no longer going to be used in a Lab, move it!
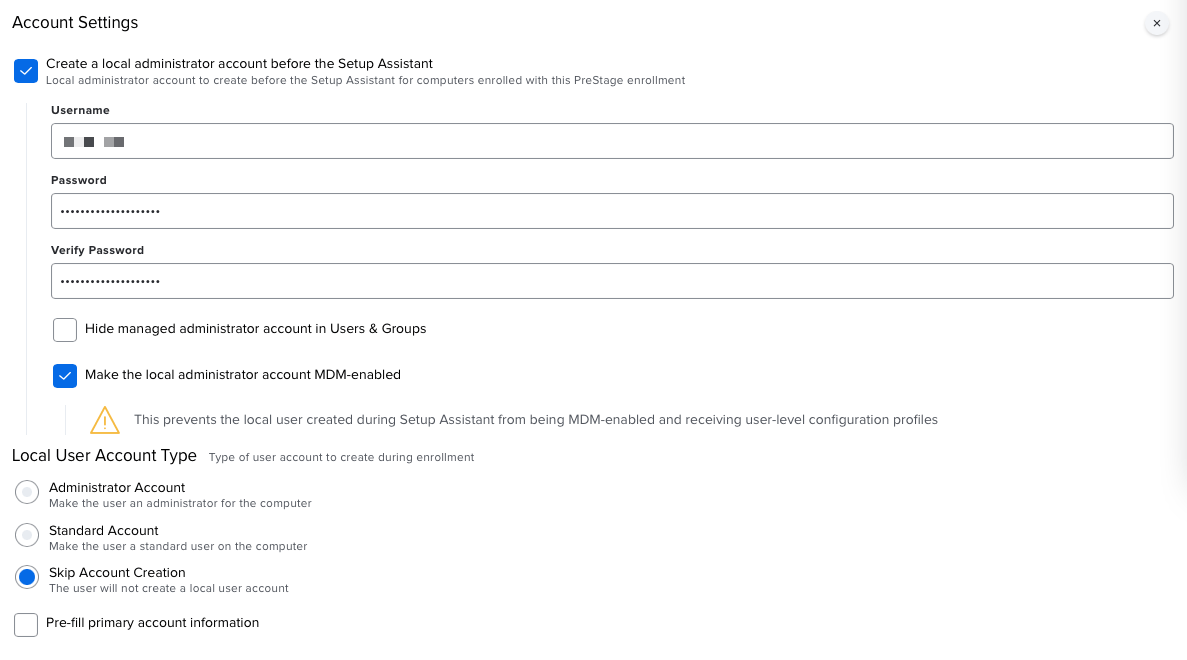
We're going to have the PreStage automatically create a local administrator, and then skip the account creation process.
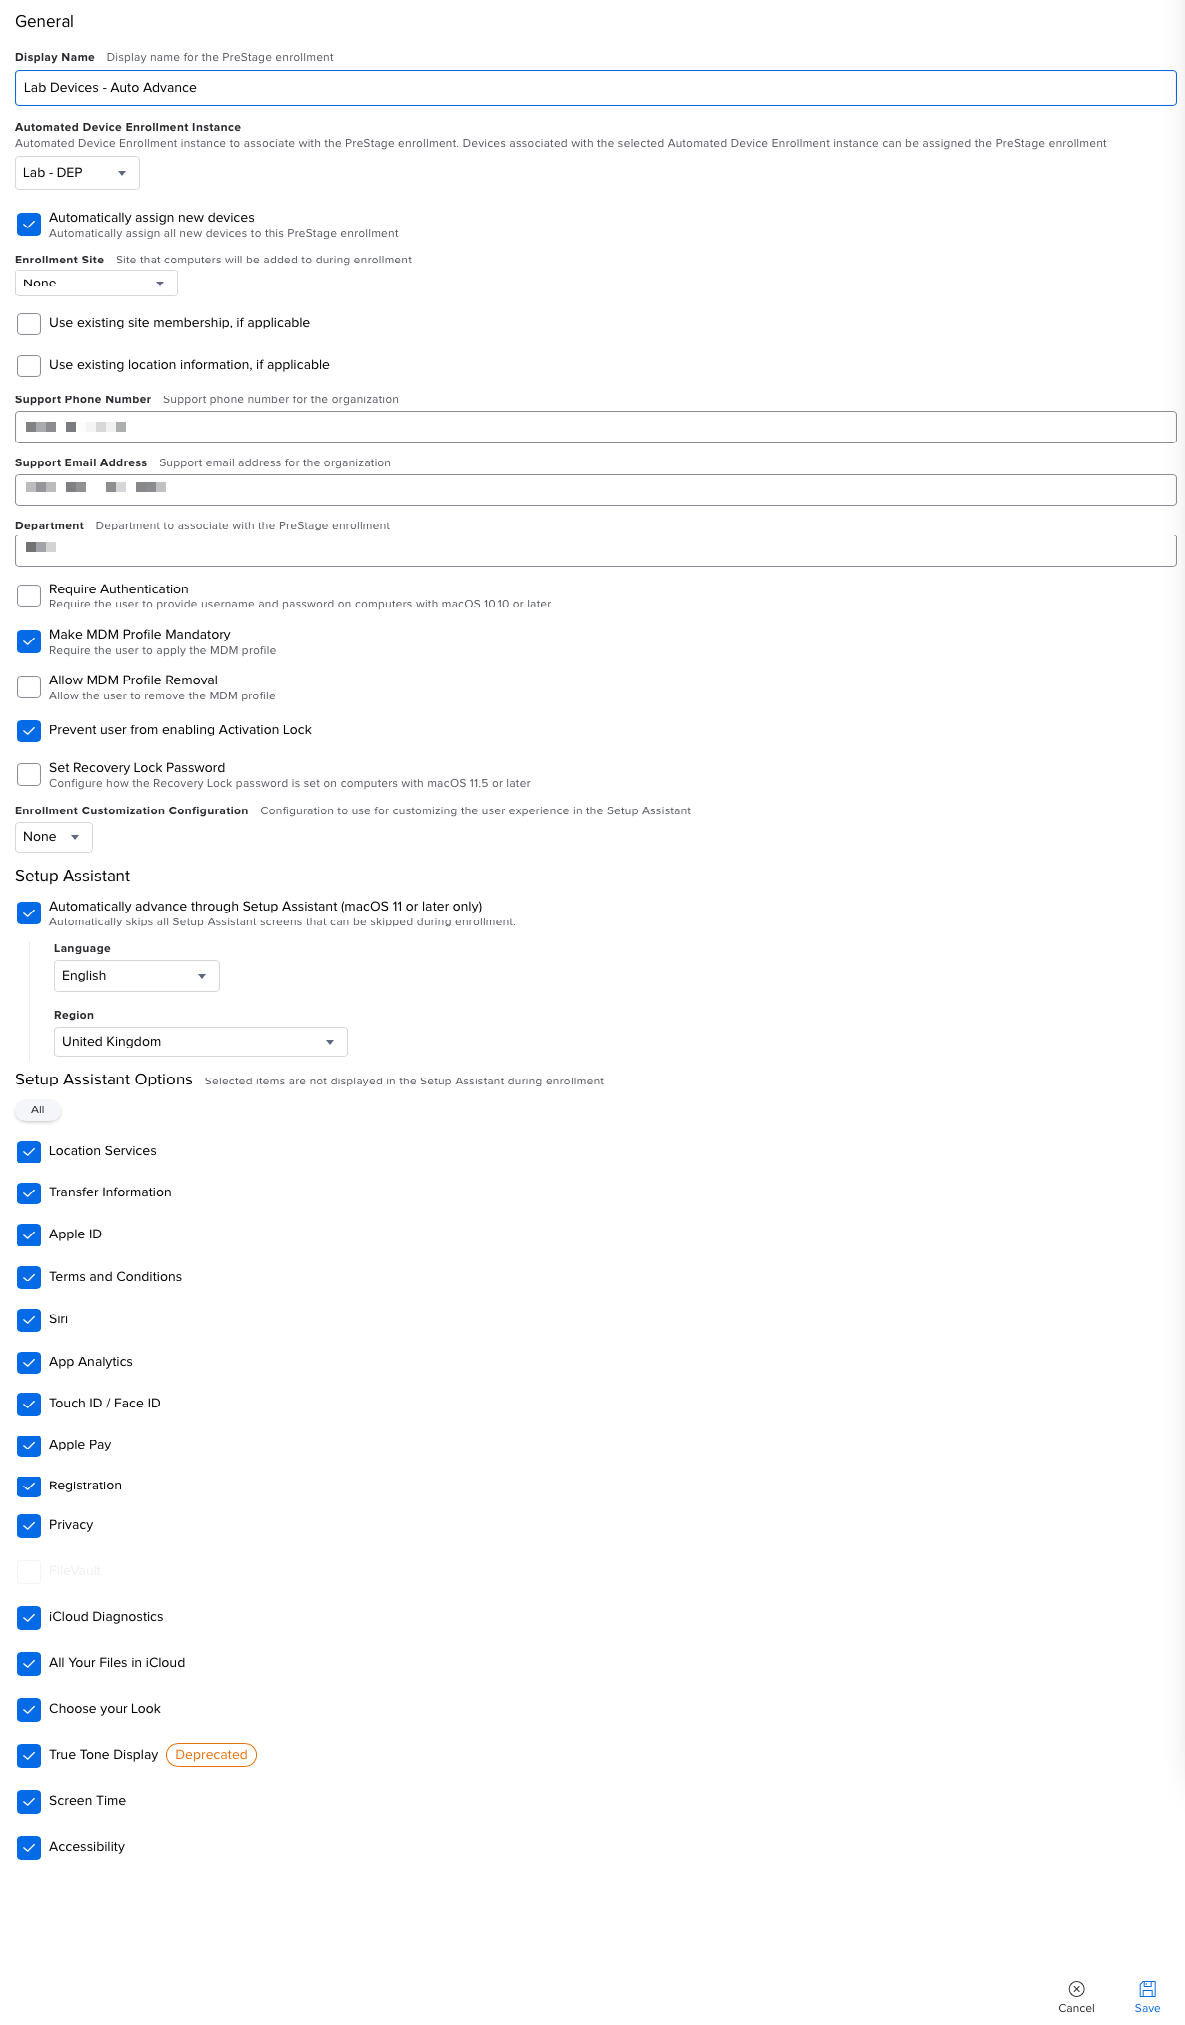
Here are a couple of screenshots of all the settings I’ve configured for this PreStage. As you can see, I’ve also added a few extra bits that will make my life a little easier. You may, or may not, need to do this depending on your environment.
Note that I've selected the Lab - DEP ADE instance, and chose to automatically assign new devices.

With all these steps completed, we’re now in a great position to move on to the next part.
Summary
I think that’s enough for the first post in this series. The second post will head in to configuring the scripts, packages, and policies required to make the next stage possible.
But to sum up. In this post, we’ve covered the basic requirements needed for this to be possible like Apple School Manger ordering, along with how I’ve configured DEP on both the ASM and Jamf sides. And also the PreStage setup required to make the next steps possible.
As I said at the beginning, this is mostly for me for if I ever need to try to re-create this again (I hope not). But, if it helps someone else out there too, then that’s a bonus.
The post Photo for this post series was by Quaritsch Photography on Unsplash